Tuesday, February 10, 2009

Create Glassy Menu Bar

Hi friends now once again i am with some new things for you as i promice you. I like glassy effects too much.so here i am with glassy top menu bar for your website. yes you can create web 2.0 style glassy menu bar for your website and when you are designing website for you clients. As this is mostly use in website design so I think every web designer should know this glassy effect. It's so simple to create glassy top menu bar for website.

Ok ok don't get bore I stop my mouth and start our tutorial as i promice you that I'll always give new tutorials here about graphic design, web design, css, html, javascript, flash. So keep visiting and don't forget to put comment so that i can improve this place to make most suitable to you.

Step1: Open Photoshop and press ctrl+N to open new document. Set value as per your website's requirement here i set widht-500 px and height-75 px resolution-72 px / inch. Fill black color in it.

Step2: Press shift+ctrl+N to create new layer. Put guide as shown in the second image below. Go to View menu and make Snap setting as given in below first image. Now press 'U' or select Ronded Rectangle Tool and make selection as shown in below second image after setting it's redius to 10px.


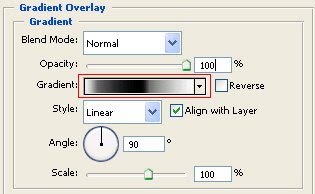
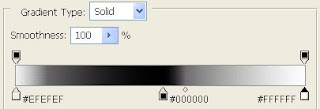
Step3: Fill black color in it. Go to blending options and make following settings for Gradient Overlay. After doing this click on the area highlighted with red border to edit gradient colors. Set gradient colors as given image below. You can set your own colors to match with your website's colors. This is the main portion of the glassy effect so set values carefully.

Step4: Duble click on the same layer or manually go to blending options. select Inner Glow and make settings as given below.
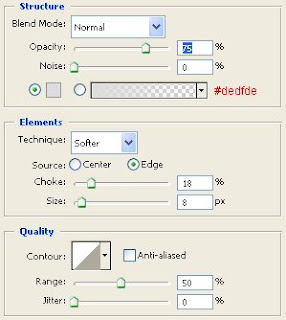


Step5: Now last but not list Duble click on the same layer or manually go to blending options. select Stroke and make settings as given below.
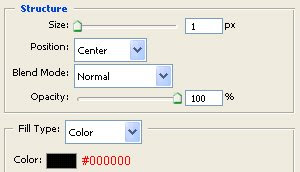


You are done now your glassy top menu bar is ready you just need to put text links in it and your result will look like below given iamge.


How simple and you can do this web 2.0 style glassy menu in just simple 5 steps. In simple 5 steps you'll get awesome output. I am sure you learn something important related to graphic design and web design.

Keep visiting,
Keep commenting,
Keep learning. Stumble Upon Toolbar

Saturday, February 7, 2009

Good News In Recession Period


VADODARA:

Engineering and construction major L&T would recruit nearly 10,000 people over the next three years for executing its various projects, sources in the company said on Friday. The new work force would be deployed for projects like mono rail, power reactors and turbines, they said.

Of these, 5,000 would be recruited for the USD 7- billion group's power equipment manufacturing facility and other units at Hazira, Gujarat, the sources said. L&T plans to invest Rs 4,500 crore in Hazira, where the company has heavy engineering manufacturing units.

L&T expects to generate project export revenue of over Rs 2,000 crore in five years, the sources said.L&T Chairman A M Naik has already announced making Vadodara a hub of power, hydrocarbon and engineering activities of the company, a diversified entity whose operations range from ship building to software.L&T is also ready to undertake execution of nuclear power projects on turnkey basis, the sources said, adding sites of two of the four 700 mw plants have been selected.

http://economictime s.indiatimes. com/News_ by_Industry/ LT_to_recruit_ 10000_in_ three_years/ articleshow/ 4089205.cms

Curtesy: Nilay Parikh [Yahoo Group: Gujarat_IT_Movement]
Stumble Upon Toolbar

Sunday, February 1, 2009

Create Vista Like Button With Photoshop

Hi friends,

Lets once again learn something which really helpful in graphic design and web design. Here I am with some good stuff to teach you how to make vista like button whith the help of photoshop. It is very simple and you can make vista like button with 10 simple steps, here I guess that you have basic knowledge of ph0toshop and it’s tools. So lets start.

step1: Take new document with black background and 150 pixel width and 50 pixel height.

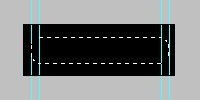
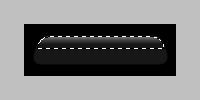
step2: Take a Rounded Ractangle Tool and draw shape shown in the image below after putting guide both the side.

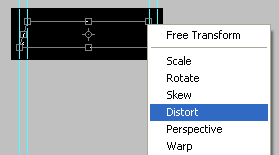
tep3: From select menu select Transform Selection and transform it as shown in below image after selecting Distort from Quad Menu.

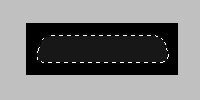
step4: After applying transform to it fill #171717 color in it.

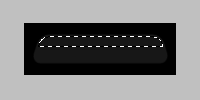
step5: Press Cltr+Click on layer and select the shape, Go to select > modify > contract. Put value 1 in the dialogue box open. Then after press alt+select and remove half of the selection as shown in below image.

step6: Select linear gradient one side color of gradient is same as you fill in the shape i.e. # 171717, and another side gradient color is #6b6b6b, and fill this gradient carefully. Which gives you following output.

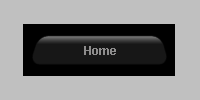
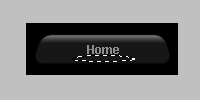
step7: Take text layer and write something here i wrote Home. Keep Font - Arial, Size - 12, Stye - Bold, Color - #8e8d8d, You can make your own specifications for text.

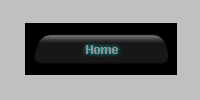
step8: Upto this, this is your normal button image, now i am going to show you how to make hover button image. For that make Duplicate layer of text and give it Outer Glow from blending optons and keep glow color is #0c8d91. You’ll get following result.

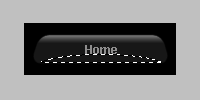
step9: Now make selection as shown in below first image.and then go to select > feather, set feather value 5. Which resulting image second.

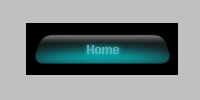
step10: Take linear gradient and set first color same as you fill in the shape i.e. #171717 and another color is as per your choice and as per your layout’s color combination, here i have used #0eb2b8 this color. now fill this gradient color carefully. Now press cltr+Click Main shape layer which shown selection of your main shape now from select menu click on the inverse and then press delete this remove unnecessary part of gradient which you just fill. This resulting in following output.

Here is your vista like button is ready.
Enjoy the miracle of photoshop. Keep visiting and commenting, which helps me to improve my blog.


Stumble Upon Toolbar